[Guest Blog post by Jo?o Janz]
Before we Start…
With this post I?m aiming to try and help anyone who wants to start recording foley sounds and doesn?t have a huge budget. It?ll be a simple list of do?s and don?ts that I?ve gathered from my experience on the field. I?ll try to be as down to earth as possible because I realize that there isn?t a lot of organized information out there on this subject. If you?re a beginner, besides the ?best mics? or ?coolest sounds? articles on the internet, you?re not going to have much luck finding good foley recording tips unless you scour dozens of old forum threads. But don?t worry? I already did that for you!
For the sake of timekeeping, I?m going to assume you?re already acquainted with the basics of sound recording and editing, so I won?t have to explain what recording a sound is or what a Digital Audio Workstation (DAW) is. There are already a lot of great threads and articles on the internet about the basics of audio production you can educate yourself with. So let?s get started!
Note: All prices listed from Thomman.de except where stated and are correct as of time of writing.
Equipment
The biggest concern of recording foley on a budget is the cost of the specific equipment itself. If you?re a beginner and you already have some kind of a home studio set-up, you probably already have a microphone lying around somewhere, so you?re all set if you want to record something in your studio. But the challenge here is when you want to record something outside your studio, which realistically is what you?re going to do the most unless you have a big studio and budget, which if you do, I don?t know what you?re doing reading this!
Recording Gear
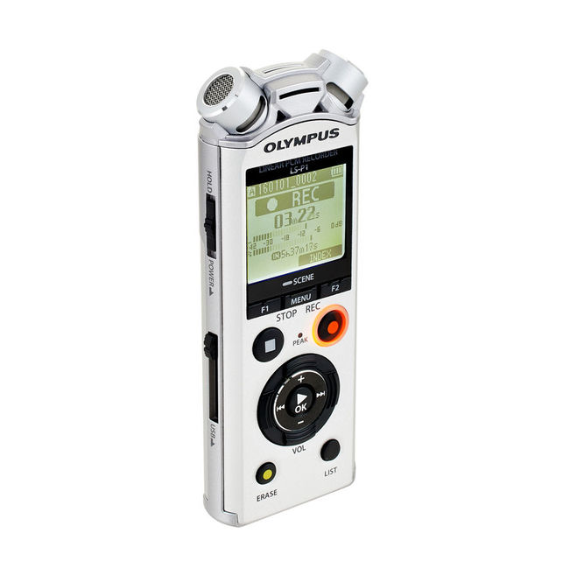
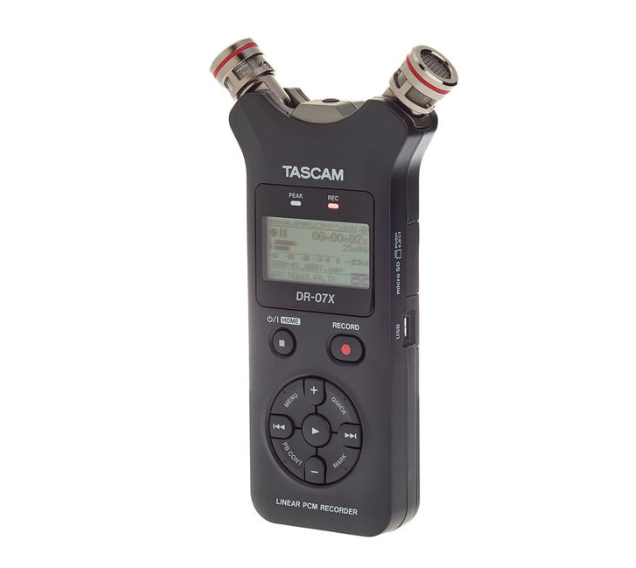
For field recording on a budget, what you want to do is get a portable recorder, which is a device that?s usually battery powered, with built-in microphones, preamps, and internal memory storage. Pricing usually ranges from relatively cheap to very expensive. The best-bang for your buck is going to be the Tascam DR-series and the popular Zoom recorders. For the entry-level models, prices start at around 100$ and can go up to 200$. But you have to be careful when choosing one of these recorders because sometimes the product specifications you find online don?t tell the whole story. You should look for a recorder that can record stereo at a 48 kHz / 24-bit quality because that is the industry standard. You should also look for one whose preamps generate a low self-noise level as it can make a world of difference especially later during the editing process. You?ll find it described as EIN A-Weighted (check this list out: http://www.avisoft.com/recorder-tests/). The lower the number the better, for example -120 dB is better than -110 dB. This is what sets apart the cheaper recorders from the mid-range recorders in my experience. You might spend a few extra bucks on a recorder – but trust me – it will be worth the extra sound quality. In terms of the type of microphone itself it doesn?t make much difference because most recorders have internal small diaphragm condensers anyway. Later on, you might think of expanding your field recording arsenal like getting a shotgun mic, which has an extremely unidirectional polar pattern useful for recording very specific sounds in a ?crowded? area. If you want to future-proof yourself, get a portable recorder with extra XLR mic inputs, so you can record using your devices internal mics, pre-amps with potentially any other consumer microphone, all at the same time! Just be wary that some microphones (typically condensers) require extra voltage power to operate so you?ll have to get a portable recorder that comes with a 48V Phantom Power switch. Besides these, any complementary features like internal mixing options, effects or wireless file transferring are just welcome bonuses. And in practical terms, storage and battery life shouldn?t be a concern. Just keep an extra SD memory card and batteries on hand if you?re out in the wilderness recording hours of ambience or if you?re using more than two mics.
My Recommendations:
Olympus LS-P1 (? 92) Tascam DR-07X (? 122)
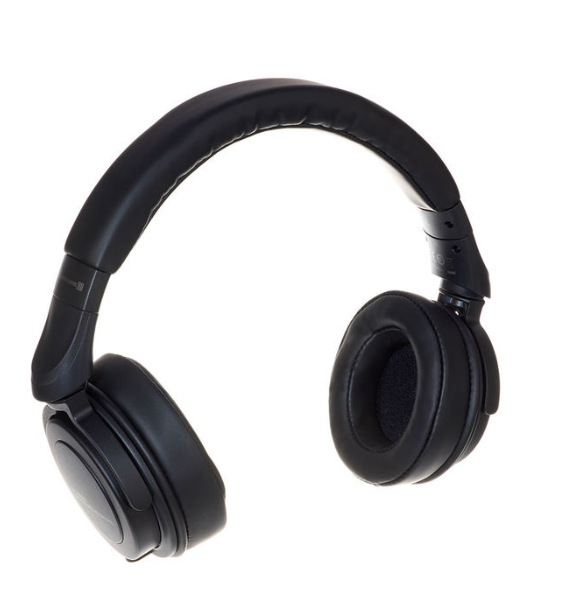
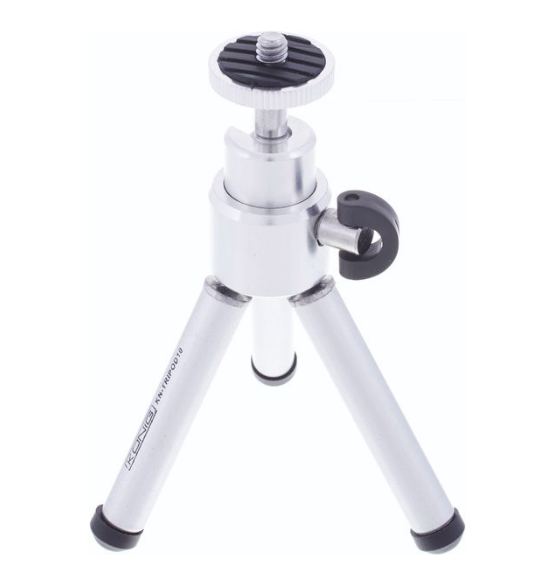
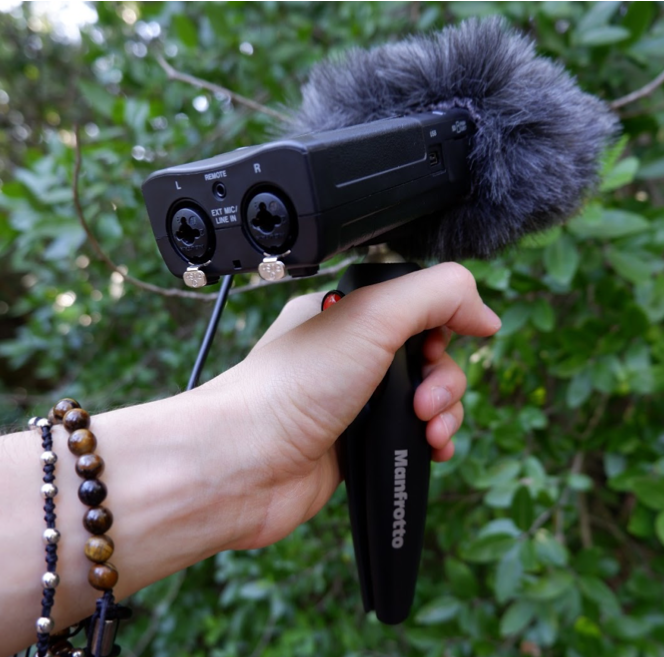
Headphones & Accessories
As for other equipment, you should get a good pair of closed-back headphones to check what sounds you want to record and to balance the gain levels without outside interference. If you?re field recording (or sometimes even indoors) you definitely have to get a wind jammer/shield or else you?ll find that, more often than not, your recordings will be all unusable. I also advise getting a mic stand. Any stand will work better than having to improvise laying the recorder on some unstable surface. You can pick-up a lot of unwanted rumbling and noise this way.
My Recommendations:
Beyerdynamic DT-240 Pro (? 69) Rode WS8 (? 23,40) Zoom WSU-1 (? 26) T.Bone Tripod 2 (? 4,90) Manfrotto MTPIXI-B Pixi Mini-Stand (? 20,90)


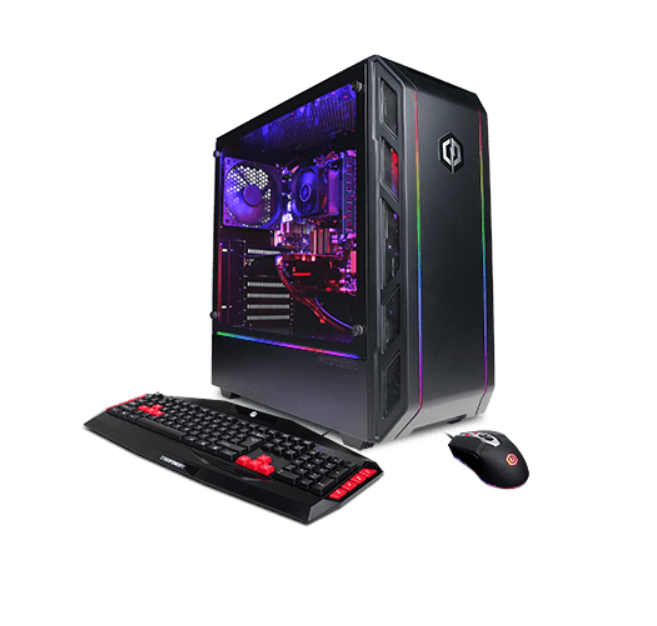
PC Hardware & Workstations
At this point, I?m going to assume you have a computer, as pretty much everyone in the 21st century has one. Any notebook or gaming PC will work fine, and if you already are an audio/music production enthusiast, chances are you already have your personal workstation. For foley editing and mixing, computer specification requirements are minimal, and you?ll even get decent performance with a 2-core CPU and 4 GBs of RAM. That is unless you?re working with dozens of audio tracks and stuffing each one full of insert plugins. But if you?re in the market for a budget PC, my minimum recommendation would be a quad-core CPU and 8 GBs of RAM. If you got an extra $100, get an eight-core CPU and 16 GBs RAM. Stick to AMD, as they are today the best value for workstation parts.
Examples:
GAMING INSTANT SHIP GM 9919 ($ 659 at Cyberpowerpc) HP Pavilion Gaming Desktop Computer (? 509.26 at Amazon)

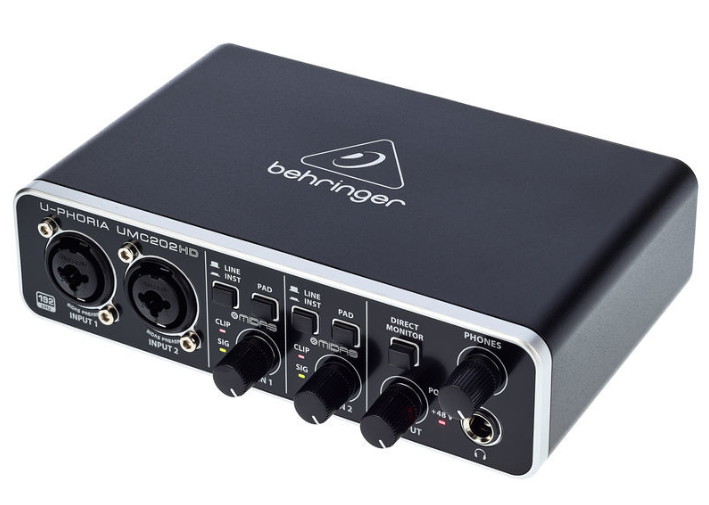
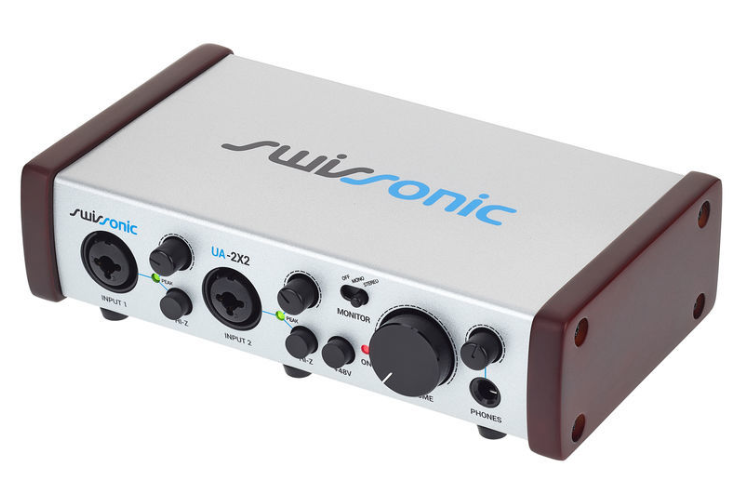
Audio Interface
The audio interface is an essential part of any producer?s workstation but starting out you?ll get plenty of mileage using your computer?s integrated sound card. There is a slight difference in quality though and I recommend you get one when you can. Without one, you also won?t be able to make quality recordings directly to your computer?s DAW using a traditional XLR microphone. Meanwhile, just use your portable recorder, which basically is an audio interface in itself. I would recommend an USB powered audio interface with at least 48 kHz / 24-bit recording/playback ability, a headphone jack output, a stereo output and two XLR inputs/pre-amps with 48V Phantom. You can find this setup for dirt cheap and it will last you for years and years, unless of course, you feel like you need to upgrade.
My Recommendations:
Behringer U-Phoria UMC202HD (? 66) Swissonic UA-2×2 (? 49)
Software
Digital Audio Workstations
In terms of software, you?re going to want a DAW with good editing capabilities. On paper, even a free audio editing program like Audacity can handle the worst foley editing session you could throw at it but you?ll want use a DAW whose strong points will enable you to maximize your workflow. When editing big foley sessions you?ll want to be as effective as possible to save time. And time is money. So I would recommend investing in a tried and tested DAW. Pro Tools is the industry standard but it is very expensive and unless you?re aspiring to work for a professional studio you can bypass it at this stage. Any one of the popular DAW?s like Logic, Cubase or Ableton Live (the one I use) will work fine, each one with its advantages and disadvantages. For the budget-minded, I would recommend Reaper (60$) which is a powerful and versatile recording software with amazing customer support. There are some other free options to consider like Pro Tools First, Cubase LE or Ableton Live Lite, but you?ll be quite limited in one way or another.
Effects & Plugins
As for mixing/editing plugins, you can easily make a living out of your DAW?s stock plugins or the tons of free plugins available (check out vst4free.com). Realistically, for foley, you?ll only need some Equalization, Filtering, the occasional Gating or, if you need to get more creative, some Reverb, Delay, or other time/pitch-based effects.
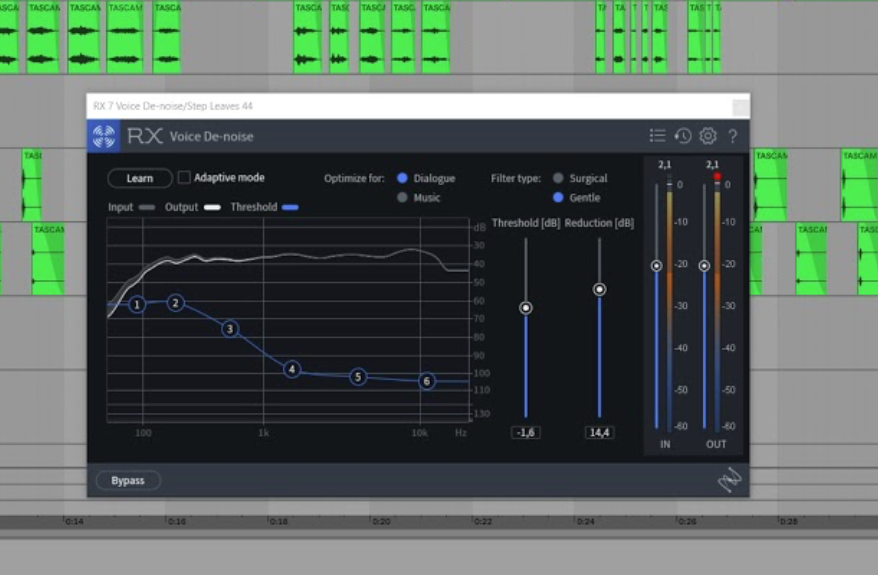
What you should look into is getting a good de-noising software plugin. Izotope?s RX series is the industry standard and it comes as a package with other audio treatment plugins, but even with different options at different price points, it can be a bit pricey ($129). There are some free De-noiser plugins like ReaFIR by Cockos or Redunoise by Voxengo that will get you the job done though. Be it the pre-amp?s self-noise or a random unexpected sound, you could easily run into issues on your recordings. While some purists despise relying on post-processing software plugins to get a perfect recording, you as a budget-minded person without the best equipment around, should adopt a middle-of-the-road approach to field recording and always have your trusty de-noiser on hand. It will take care of the issues that will eventually arise because of your inexperience and or just plain bad luck.
Field Recording
Preparation & Approach
Now that you got all the equipment, the first thing you have to do is make a list of what sounds you want to record and assess the location itself. Good preparation is the key for a productive field-recording session. Constantly check the weather for anomalies – wind and rain are your enemies, unless that?s exactly what you want. Also try to choose a spot that?s far away from anything that might ruin your recordings. Bird chips might ruin your ?Urban City Ambience? just like distant car traffic and horns might ruin your ?Nature Ambiences?. It all depends on what you want to capture and a good trick is to always record primary sounds. Depending on what you?re focusing on, there are always primary and secondary sounds in any given soundscape. A good example is when you?re recording your washing machine and you hear your next-door neighbors arguing. The washing machine sound is your primary, and your neighbors are secondary. If by any chance you do want to create a soundscape of people arguing next to a washing machine then you can always add those separate elements later. This will allow for a larger degree of control and thus better sound quality. So, always record specific sounds in isolation and then combine them together in post to create the perfect soundscape! A sound-clip of a cat meowing during a thunderstorm would be useless? but awesome.
Pressing Record
As for the recording itself, it?s quite straightforward. Put on your headphones and place the recorder somewhere secure where you can perfectly hear the source of the sound and don?t have any other interfering sounds or noises. Then set the gain as high as you can without it peaking, then lower it a couple of dBs to find that sweet spot. If the gain is too high, it will distort and create unwanted artifacts. If the recorder is too far away from the source, the pre-amps self-noise will ruin your recording (more on that later). After all that you can press record and do your magic!
It is wise to record as many variations as possible on the same sound so you can have the luxury of choosing the best sounds later on. You?re also going to be surprised, especially starting out, at the amount of recordings that get ruined by things you didn?t even notice at the time. If you?re recording sounds that you know are going to be repeated a lot, like footsteps or weapon sounds, it?s best to get slight variations as well. If you use the same sounds over and over it will sound robotic and create what?s known as the machine-gun effect.
You should also name your clips appropriately so later on when you?re editing them you know exactly what you?re doing. I didn?t do this myself at the beginning, and trust me, when you record hundreds of sounds, you?re not going to remember whether this sound came from a wool sweater or a polyester shirt. So just record yourself saying what you?re about to capture at the beginning of each clip.
Space & Acoustics
I also want to mention something about acoustics and reverberation. Whenever inside, try to record in ?dry? places. This means rooms with little echo. If you don?t have an acoustically treated room, usually a small room filled with furniture will do great as all those materials will absorb and diffuse those nasty reflections and create a dryer sound with a more even frequency response. The idea here is to give your recording a blank acoustic canvas so later on you can just add your own digital reverb to make it match the soundscape you?re looking for. If you record different foley in various rooms with drastically different acoustics, your final mix is going to sound off. But of course, this all depends on what you?re going for.
Post-Production
After you?re done recording and you?re back in your studio, you?re going to have to edit and mix all those sounds. This is considered as the worst part in foley recording as it can get quite boring and monotonous. So, there are a few things you should do to make this task as fast and pain-free as possible.
Editing
Workflow is king! Workflow basically means your method of work and your micromanaging preferences which over time impact your efficiency. It differs from person to person but there are a few universal things that you should abide by. You must know your DAW inside out! This means its strengths, its flaws, and more importantly, its shortcuts! You?re going to be doing a ton of cutting, zooming in/out, fading in/out, crossfading, exporting/bouncing, consolidating, creating tracks, deleting, grouping, you name it. You should know all this like the palm of your hand so you can be as efficient as possible with your time.
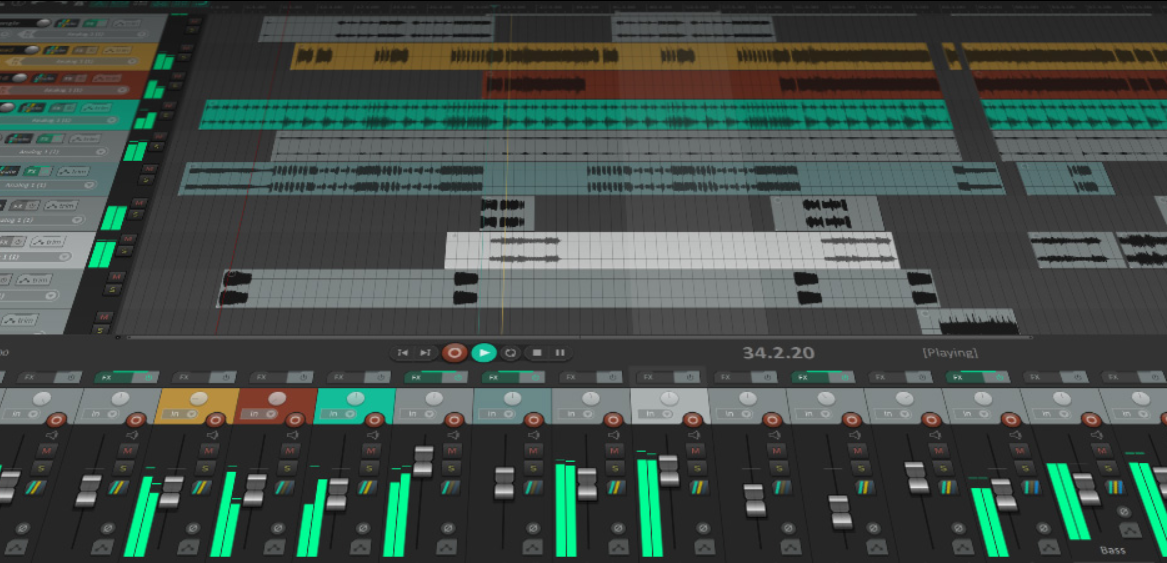
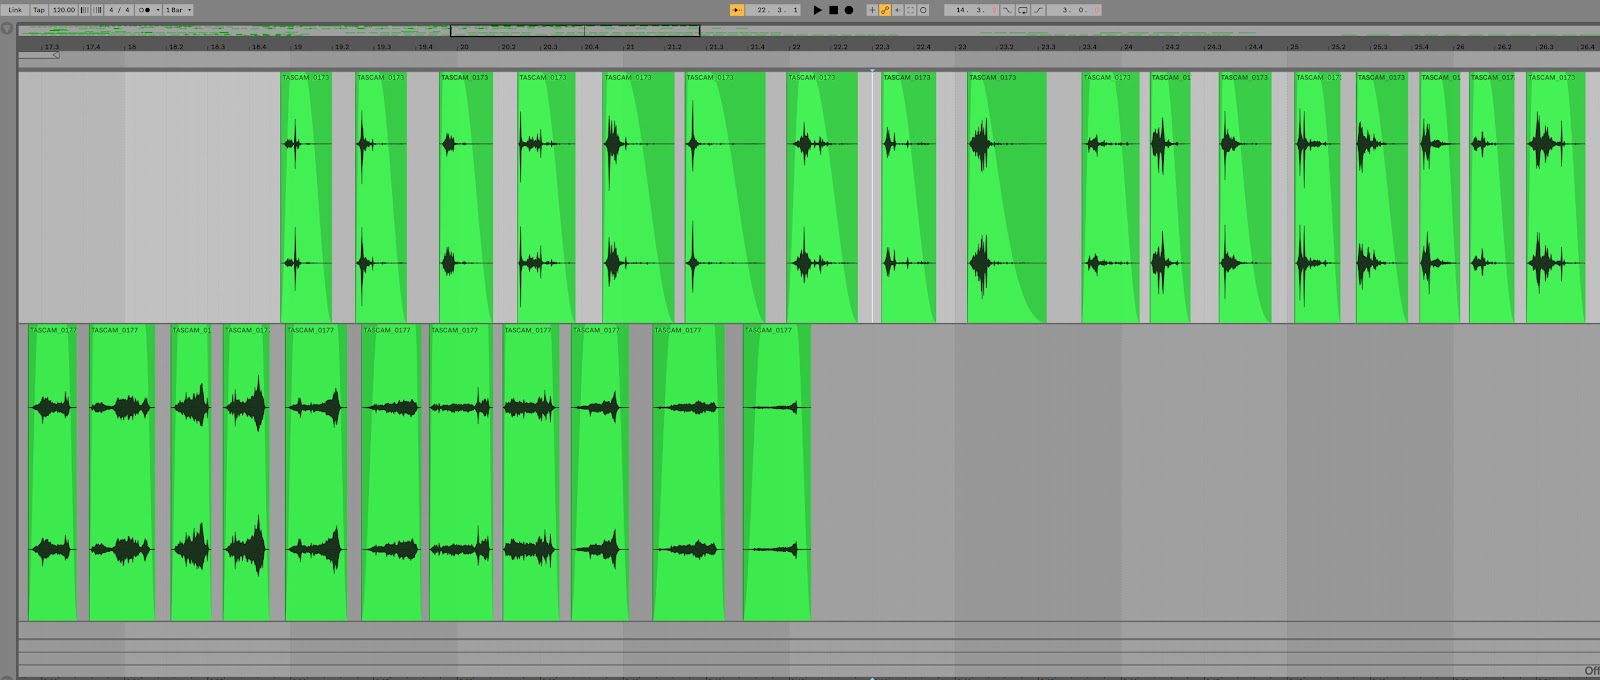
In your DAW, drag each clip inside an audio track and name them accordingly so you don?t get lost. After that, you?re going to edit out all the stuff you?re not interested: bad recordings, secondary sounds, artifacts, weird noises, etc. and you should be left with the good stuff. If you want, you can do an extra screening and pick the variations you like best. When editing, a good use of fades and crossfades goes a long way on making a recording sound clean. If you’re editing longer recordings like ambiences and you end up with multiple splits because you had to cut out unwanted artifacts or sounds, you can seemlessly re-join these clips by overlapping both ends and creating crossfades. With short clips, you can also easily control the attack and release of a sound by simply playing around with the fade in/out. Check out the picture below.
Mixing
After the simple but tedious editing stage you can start mixing. This is where you gain-stage, filter out all the frequencies that don?t matter, and de-noise. You’ll often find that most recordings have a low frequency rumble that just serves to muddy up your mix. This is mostly caused by wind and distant noise and can be rid of with a simple High-Pass Filter. Always leave a bit of silence or background noise on your recordings for the de-noiser algorithm to use (if you?re using RX7). You can also use time and pitch-based effects like reverbs, delays and pitch-shifters for a more creative approach. Go crazy! This part is definitely the most fun and you?ll be amazed by how many different sounds you can create by simply turning a few knobs.
Exporting
Now back to the tedious part. If you?re creating foley packs for other people to use, exporting your sounds is more important than you think. This is when you decide how people will first see and interact with them. There mainly two approaches here: either you export every single file separately; or you consolidate sounds together and export them as bigger clips with the variations together. Obviously, exporting separate files takes a lot more work but in the end it is down to how you want people to see your work. The industry standard is to group sounds together so you get the different variations in one file, but personally, I prefer to upload my sounds separately on Freesound and create packs afterwards so people can download the specific variations of the sounds they like. Appropriately naming your exported files is crucial. There is a great article on this subject which elaborates on the importance of naming better than I can. You can check it out here.
As for the file format, the standard is a .WAV file at 24-bit bit-depth and 48 kHz sample rate. But if you?re working for someone else on a project ask them what file format they want. Often times, companies that work with limited hardware like handheld devices will ask for a lower quality format (16-bit 44.1 kHz) or sometimes even .MP3.
Finishing Up!
And that?s it! You can now call yourself a successful foley artist and sound designer. Just keep at it you?ll eventually get even better results. I hope this guide helped you in some way or another but remember: There are no strict rules; these are just guidelines to help you on your way! Your motto should always be: If it sounds good, then it is good!
Jo?o Janz’s biography:
Jo?o Janz is a professional music producer with a passion for post-production audio design such as video games, film and television! Throughout his career, his aim has been to combine his sensibilities as an audio professional with his devotion to art and the creative process in an effort to produce something akin to the wonderful pieces of art that inspired him to take on this path. Between recording nature soundscapes and composing epic orchestral pieces, Jo?o has made a carrer as a versatile music composer, sound designer and foley artist. He enjoys spending his free time uploading random foley sounds on Freesound hoping to help people with their passion projects!
Based in Lisbon, Portugal, with spanish, austrian and italian roots, he currently holds a Bachelor?s Degree in Popular Music Production from the Southampton Solent University and looks forward to continuing his studies with a Master?s Degree in Music Composing as part of the many challenges to come!
This was a Freesound guest blog post. Do you have any project or something you’d like to share in the Freesound Blog? Let us know using our contact form
For a portable recorder, you can t go wrong with a TASCAM DR-40 or the ZOOM HSP. These won t completely ruin your budget, and they are a must for anybody interested in capturing sounds on a moment s notice. If you really want to step up your foley game, carrying around a little Zoom H1 is a good way to pick up any tiny sounds you might need ? or you can use it to note the types of tones you need to come back and get later.
Really helpful post, I was just the other month searching for a good post about this on the web and this by far takes the cake on best piece of information on recorders.
Thank you so much!
J.P
Thank you for your comment! I’m glad you found this guide it useful!
Best regards,
Jo?o Janz
Great article!
Here’s a kind of workflow that might be useful to render foley audio single files into multiple folders:
https://youtu.be/CdA82cMNZ0E
Thanks for a very helpful and interesting post! I am writing one myself about field recordings for a university project (dBs Berlin).
I want t know how to make sound design but I just don’t have time or money.
Thanks to everyone who read and commented!
Henri, good luck on your project! If you need anything else, just PM me through Freesound.
MrFlimFlam, wating to do it is already a great start! You don’t need alot of time to acquire basic skills and this Post already takes cares of the budget part 🙂 Just keep at it and you’ll find it to be a very gratifying past-time.
Great article, Jo?o!! Tank you! Greetings!!
Thank you Rui! And you’re welcome! I’m really glad this article can help more people. Abra?o!
Your article is really helpful, thank you! Do you know any where I can download free videos to practice foley? Much appreciated!